smart:EQ 2 does a fantastic job of creating a natural tonal balance no matter what signal you’re working on. With the release of smart:EQ 2, we’ve included new profiles for content-aware audio processing for a spectral balance more characteristic for the sound you’re working on.
Note: We replaced smart:EQ 2 with smart:EQ 3! The intelligent equalizer now sports two AI-powered functions and was overhauled extensively. smart:EQ 2 remains a maintained and fully-functional plug-in though.
We’ve also added the possibility to create, save and share your own custom-made profiles. Find out how to harness the power of profiles with this tutorial, or read through the steps below:
Step 1: Choose the right profile for your sound source
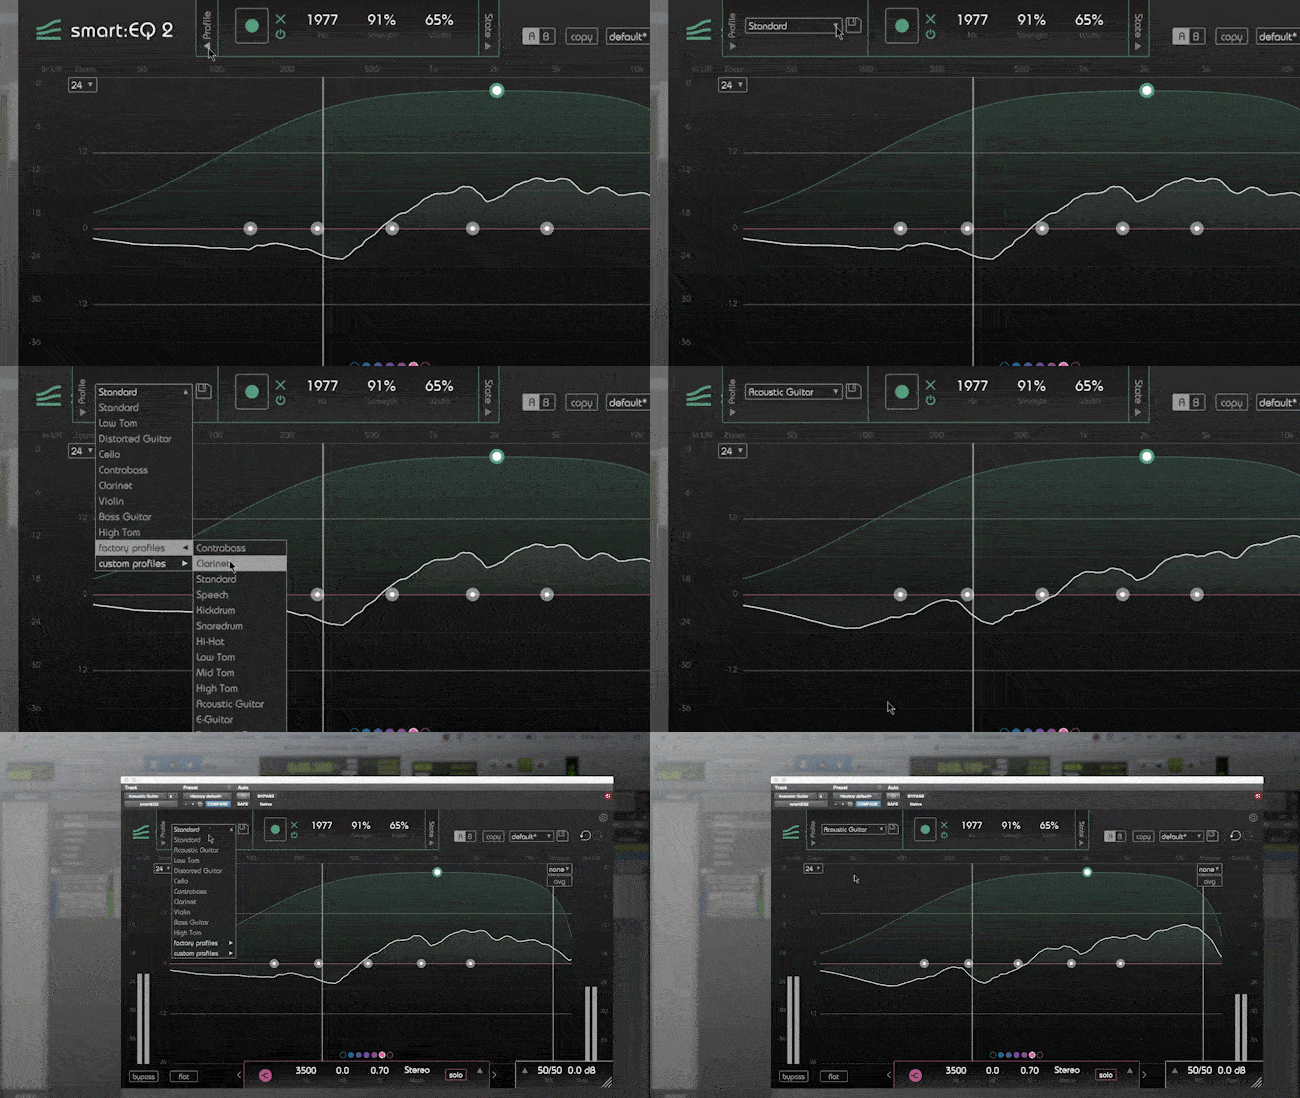
smart:EQ 2 comes with a variety of profiles geared towards a number of common mixing scenarios. Choose the profile that seems like a good fit, then hit the record button and start the playback.
(Please note that you can always start with the ”Standard” profile and switch to more specific profiles later.)
smart:EQ 2 will now compute a custom filter curve to create a natural sounding tonal balance.
Step 2: Make adjustments
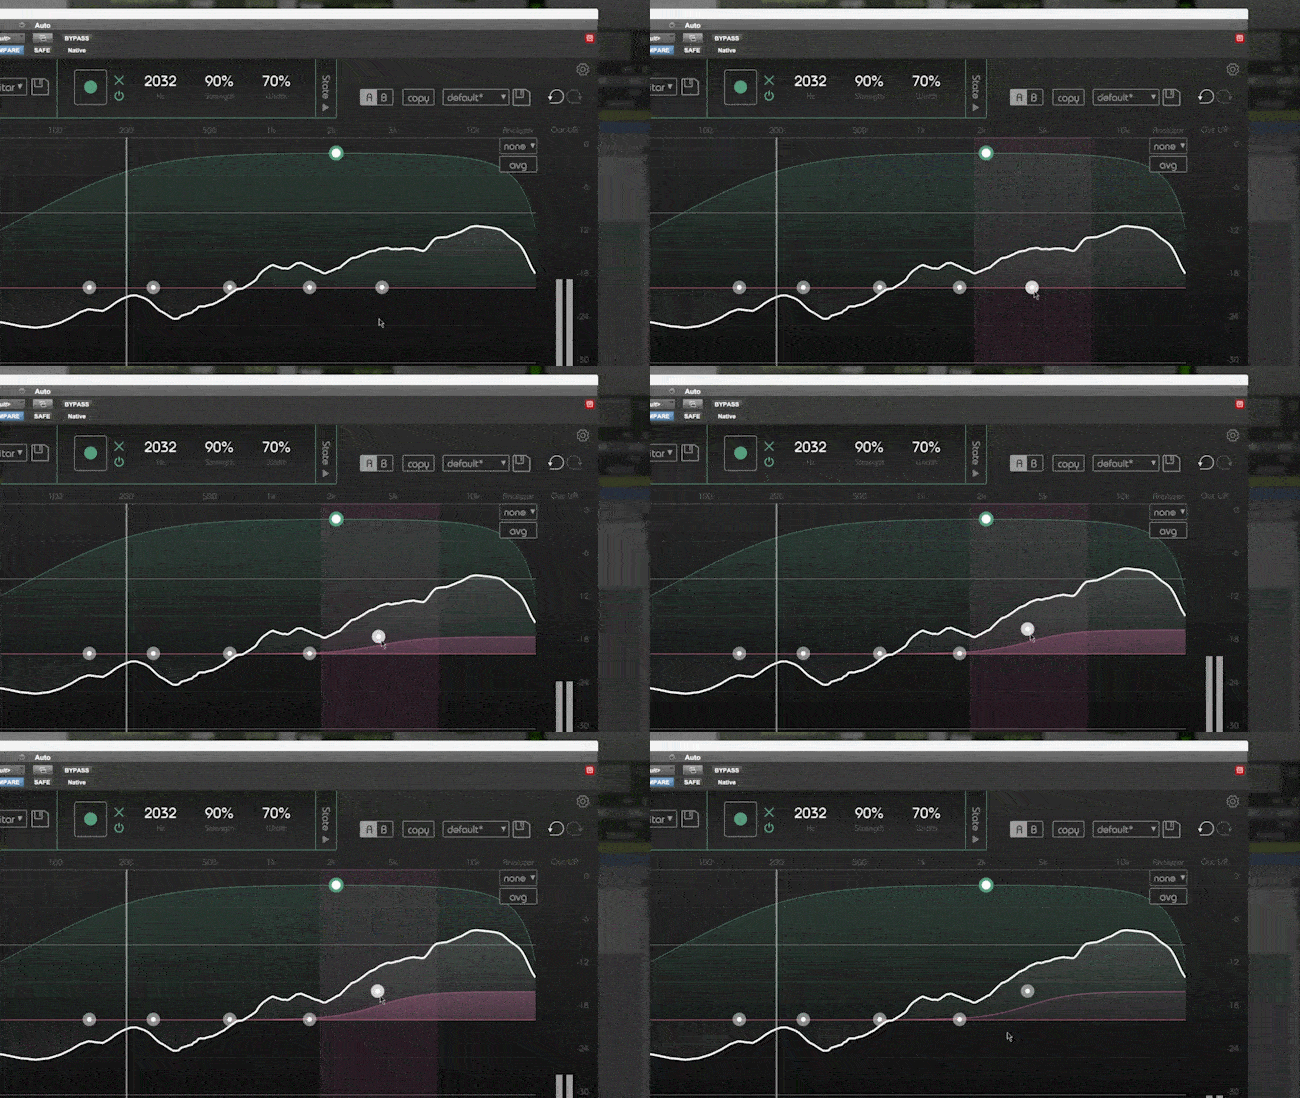
If you’re not happy with the baseline result, tweak your result as you would in a standard EQ.
Step 3: Create your custom profile
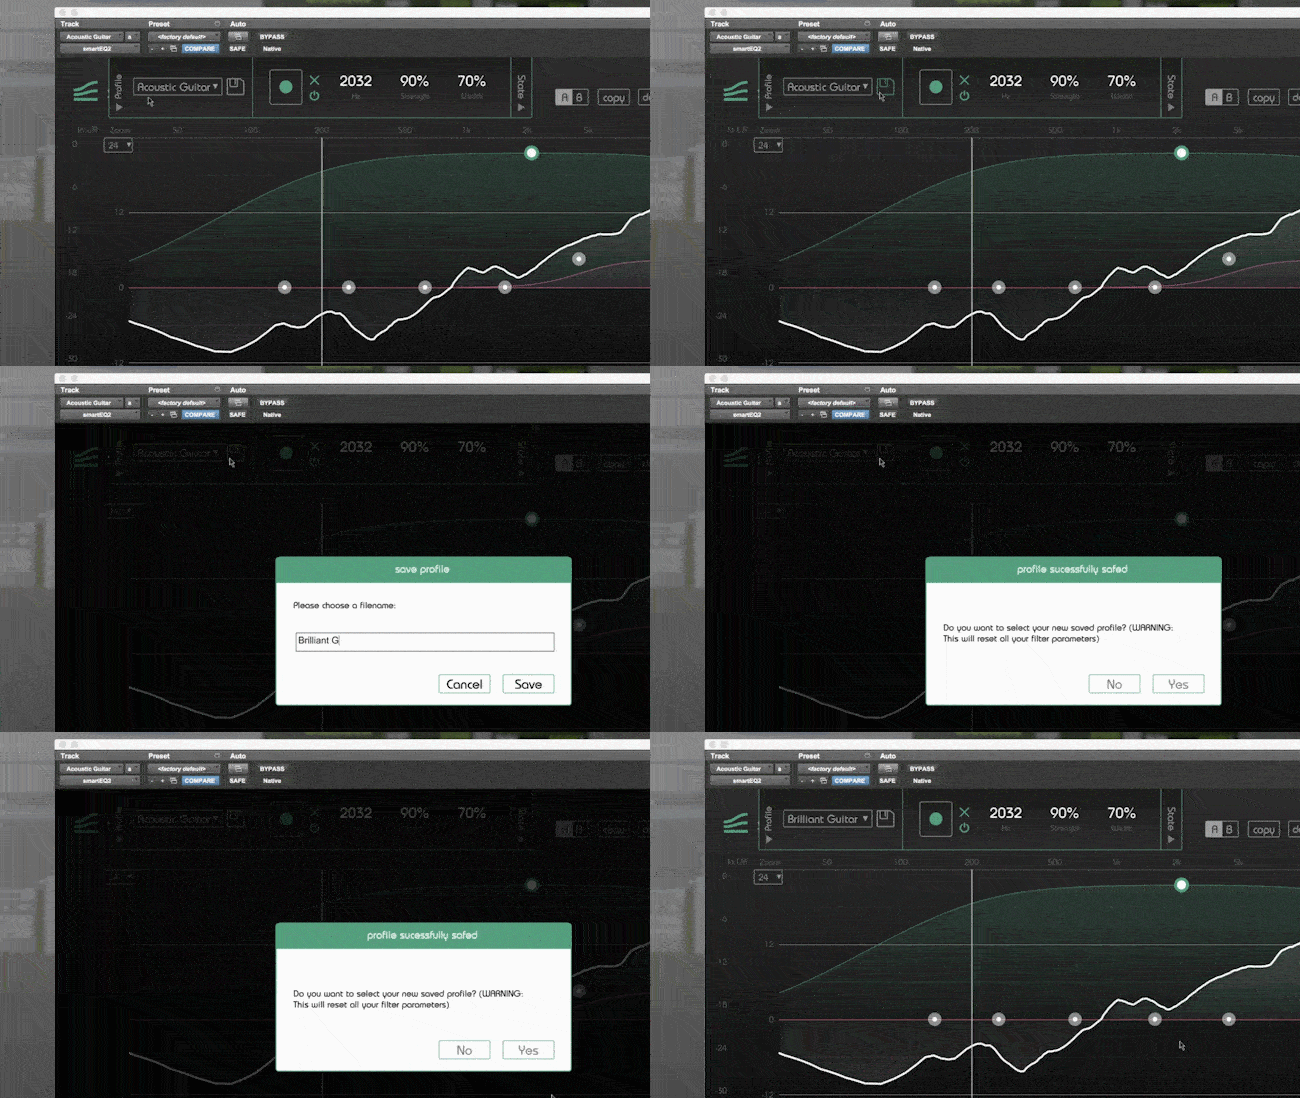
Hit the save icon and give your custom profile a name. The adjustments you just made will be used as new learning information.
Step 4: Apply your custom profile
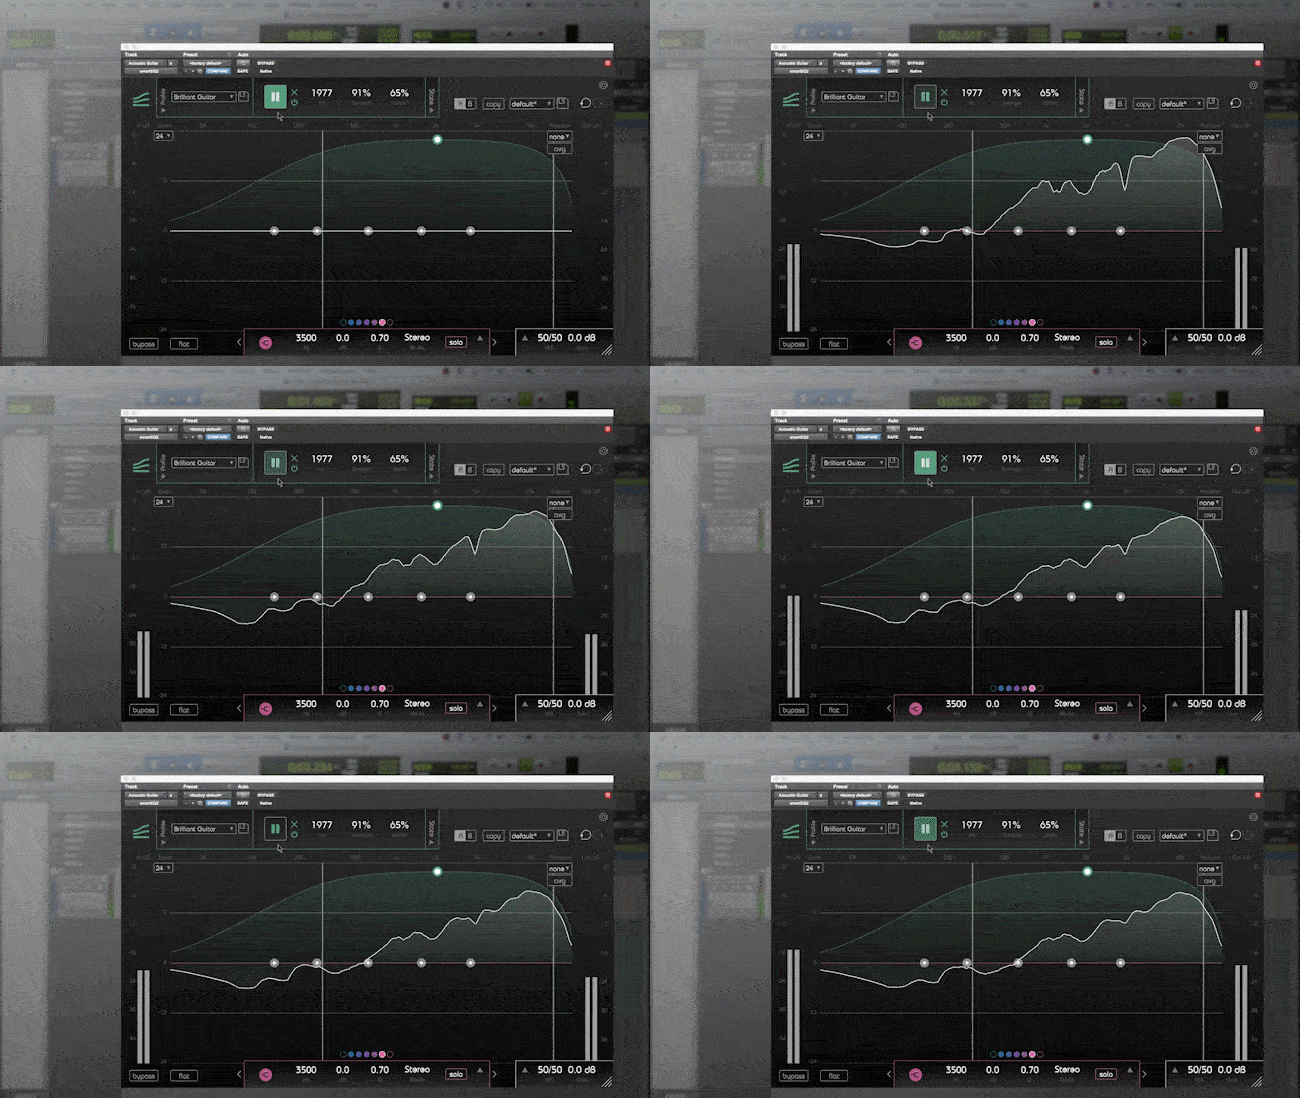
Restart the learning process with the custom profile selected. smart:EQ 2 will automatically return to the sound you dialed in before.
Step 5: Some tips for power users
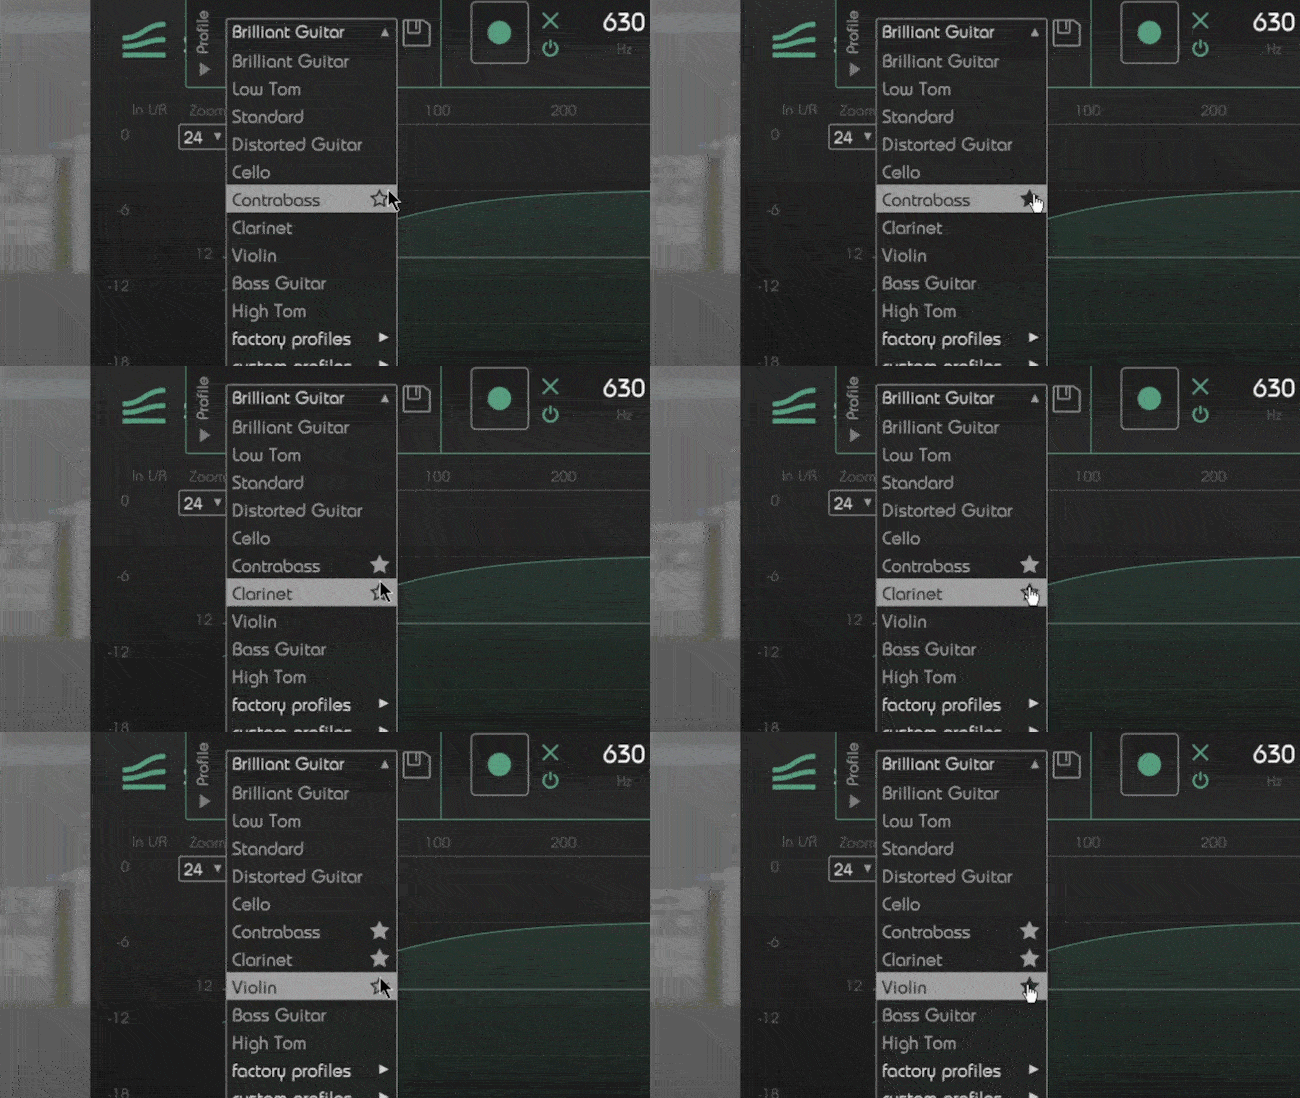
To streamline your workflow with smart:EQ 2, you can pin up to 5 profiles to the top of the fly-out menu by favoriting.
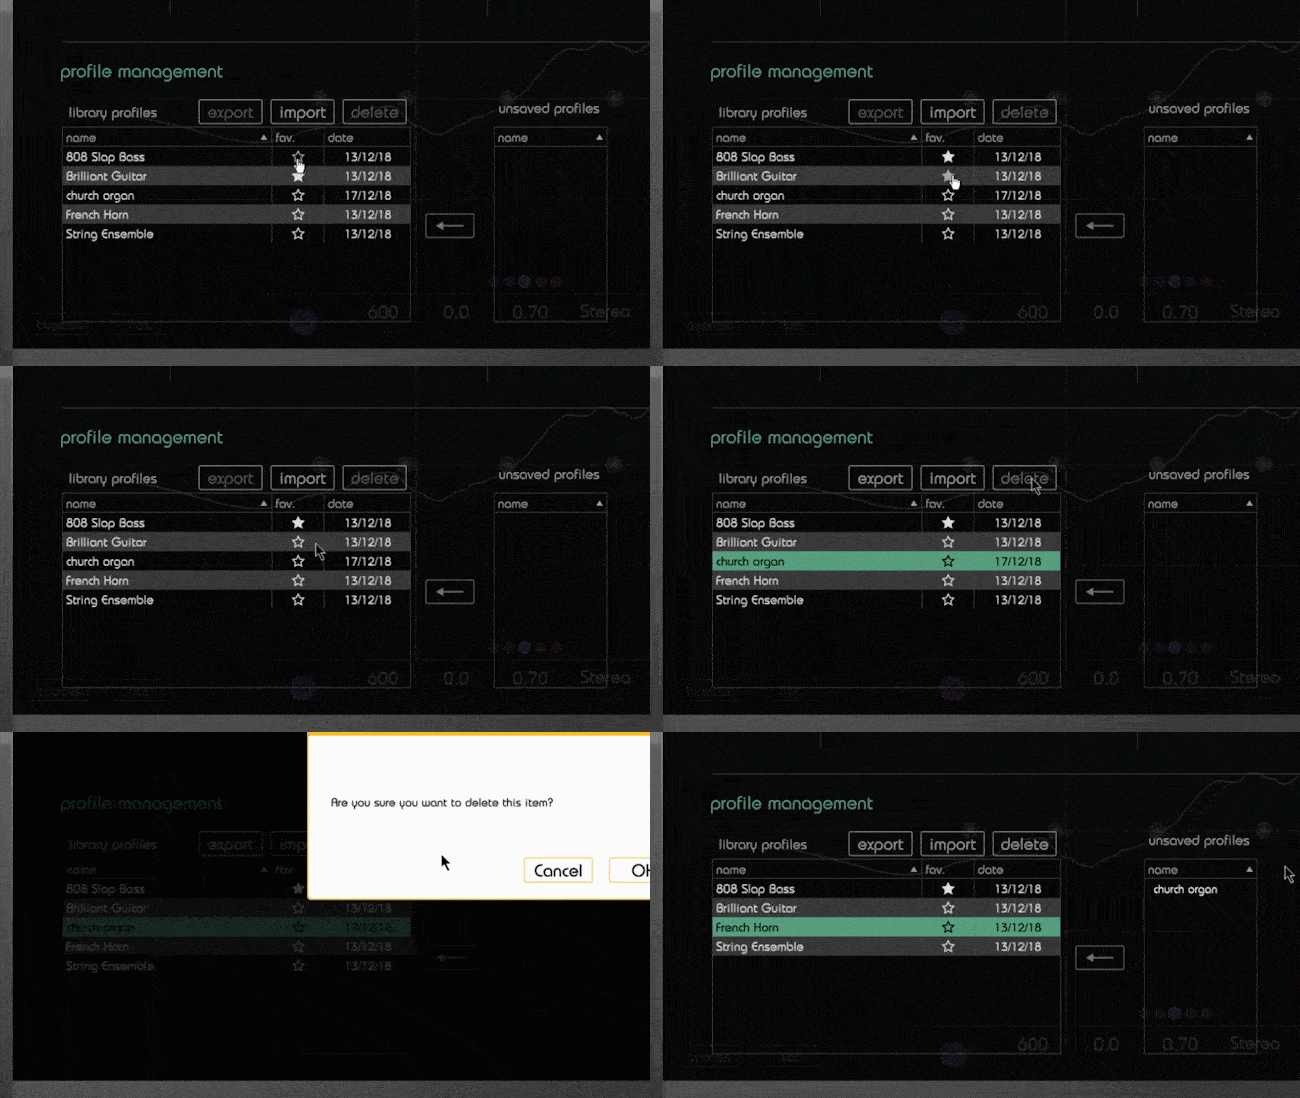
Manage your profiles in the setting menu. The library allows you to add or remove profiles from your favorites or delete unused ones. You can also import and export profiles as .spk files. Profiles from external projects not yet saved to your library will show up here, too.