Here we discuss the limitations of traditional noise or audio gating, and how the AI powered smart:gate can solve these problems.
Audio gating is a staple audio tool that is very simple in nature. You can think of an audio gate a bit like an actual gate – one that when open allows audio through, and when closed stops audio from passing through. The gate opens when the incoming audio signal crosses a particular volume threshold which you, the user, sets.
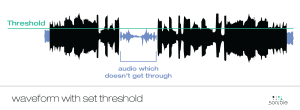
Audio gates are often referred to as “Noise Gates” as they are traditionally used as a rudimentary way to remove background noise from audio recordings. Because the noise floor of an audio recording is lower in volume than whatever your primary source is (eg, a vocal, synth or drum recording) you can set the threshold above the volume of the noise floor, but below the volume of your primary source. This means that when your vocalist, synth player or drummer isn’t playing, the noise will be gated out and your track will be silent, however when they are playing the threshold will be crossed and you are able to hear the performance in full.
However, when our current setup is taken into account, there are some problems with audio gating…
When recording a live drum kit, an engineer will typically set up with a microphone per drum (sometimes two for the snare), overheads and a room mic.
The per-drum microphones on the snare, kick, toms and hi-hat are in theory supposed to only be picking up their respective drum, however, because drums are so loud and positioned close together, inevitably microphones pick up sound from adjacent drums. This is known as “bleed” and can be a problem for producers looking to achieve a crisp and well balanced sound.
Audio gates are often used to fix this problem. Because, say, the snare drum isn’t as loud as the kick drum in the kick drum mic recording, we can set our threshold above that of the snare and below that of the kick, thus allowing only the kick drum through. This sounds great in theory, but in practice it doesn’t work quite as perfectly as you would hope. Let’s demonstrate with an audio example.
Here we have a short drum recording. The recording was made using seven microphones, we used a microphone on the kick, snare top, snare bottom, tom and floor tom. We have also used an overhead and a room microphone.
 Here’s how the beat sounds:
When we listen to the whole beat, it sounds absolutely fine, however if we solo one of the tracks you will hear the bleed that is going on.
Here is the snare bottom microphone on its own:
As you can hear a lot of the signal from the toms and kick is also present which we don’t want. This is a situation in which we would typically use a gate.
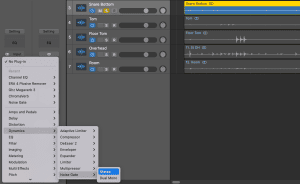
We’ll load Logic Pro X’s stock audio gate “Noise Gate”. Find it under the Dynamics section in the Audio FX browser.
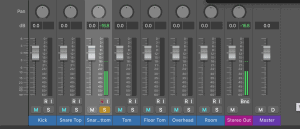
 If we look at our mixer we can see that the snare hits peak at -16.8dB, so let’s set the threshold of Noise Gate to just below this at around -18dB
 If we listen to our snare bottom track now the bleed is gone, but you’ll notice that the snare now sounds snappy and unnatural.
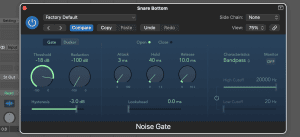 But if we bring the threshold down to allow more of the snare through, we start getting the bleed coming back into our signal.
This is where traditional noise or audio gates are weak. They cannot discriminate between different types of audio, all they can detect is how loud audio is and if it crosses the threshold then the gate will allow the audio signal through.
At sonible we aim to approach classic audio effects from a new perspective. We have reinvented the compressor, EQ, limiter and more with our ever growing range of audio processors, often powered with the help of AI technology. Now we’ve turned our attention to audio gates with our new plugin smart:gate.
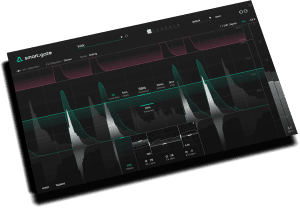
When thinking about the limitations of gating as discussed in the previous section, we realised that it may be possible to completely circumnavigate them.
The obvious solution to us was to develop an audio gate that could detect the type of instrument that is being played, not simply detecting ‘any signal’ based on level alone – instead, ‘opening the gate’ for permitted instruments and ‘closing the gate’ for non-permitted instruments.
For instance, with our previous example of removing bleed from a snare mic – we are able to tell smart:gate that we are gating a snare track, and therefore we only want snare drums to pass through the gate. smart:gate is able to identify what audio content ‘belongs to’ a snare hit and to allow only these hits through. Not only that, but the snare hits sound a lot more natural than they did when using a traditional noise gate.
Let’s remove the bleed from the same snare track with smart:gate and compare the end results.
We’ll remove Noise Gate from the channel strip and replace it with smart:gate. From the dropdown menu at the top of the UI we will select the snare profile.
Now if you press play in your project smart:gate will listen to your audio and identify the snare sound.
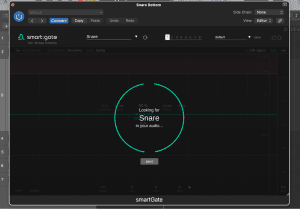 Already we can hear that the majority of the bleeding kick and toms have been removed from the track whilst leaving the snare sounding natural, something Logic’s stock gate was unable to do.
However, there is still a light bit of bleed occurring. We can remove this by fine-tuning smart:gate’s settings.
We increase the Threshold to 88% and decrease the Tolerance to 2%. This means the signal has to be louder to get through the gate, the gate will close once again at a lower level than where it opens.
In addition we will increase the Release of smart:gate to 45ms for a smoother tail on each snare hit. 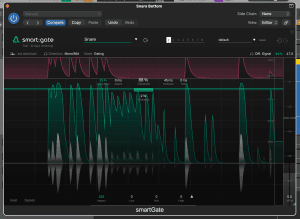 Listen to our snare track now. There is a tiny amount of bleed from the toms at the very end, but in general the audio is bleed free, and the snare hits sound smooth and natural. A huge step up from an old-school gate!
You can download the trial of smart:gate to try it out for yourself, and find out more on our smart:gate page.