Listen as we take a vocal channel from basic recording to professional standard, and explain the process as we move through every step.
From pop to rock, RnB to rap, vocals are at the heart of many contemporary styles of music. As a listener, you need to be able to hear a vocal to understand the lyrics. Vocals are considered to be the focal point in a wide range of genres, so it can be a real turn-off if the vocals are lacking. By the same token, the vocal shouldn’t stick out like a sore thumb. As a producer or mix engineer then, it’s your job to ensure that a song’s vocals are clear, present and well-balanced against other elements in the track.
In this article, we’re going to use sonible plugins and a number of advanced vocal mixing techniques to tackle the vocal mix on the below demo track. As you can hear from the audio example, the vocal element of the demo sounds lifeless, thin and uninspiring. It also feels very detached from the rest of the mix, and it’s hard to comprehend the lyrics in full.
First of all, we’re going to use smart:deess to tackle some of the plosives and sibilance in the vocal recording. While the vocal is quite dull in the verse, the chorus contains some sibilance during ‘S’ sounds. There are also some subtle plosives, but these are less problematic in this case.
As soon as we load smart:deess onto our vocal channel, the plugin prompts us to analyze the audio.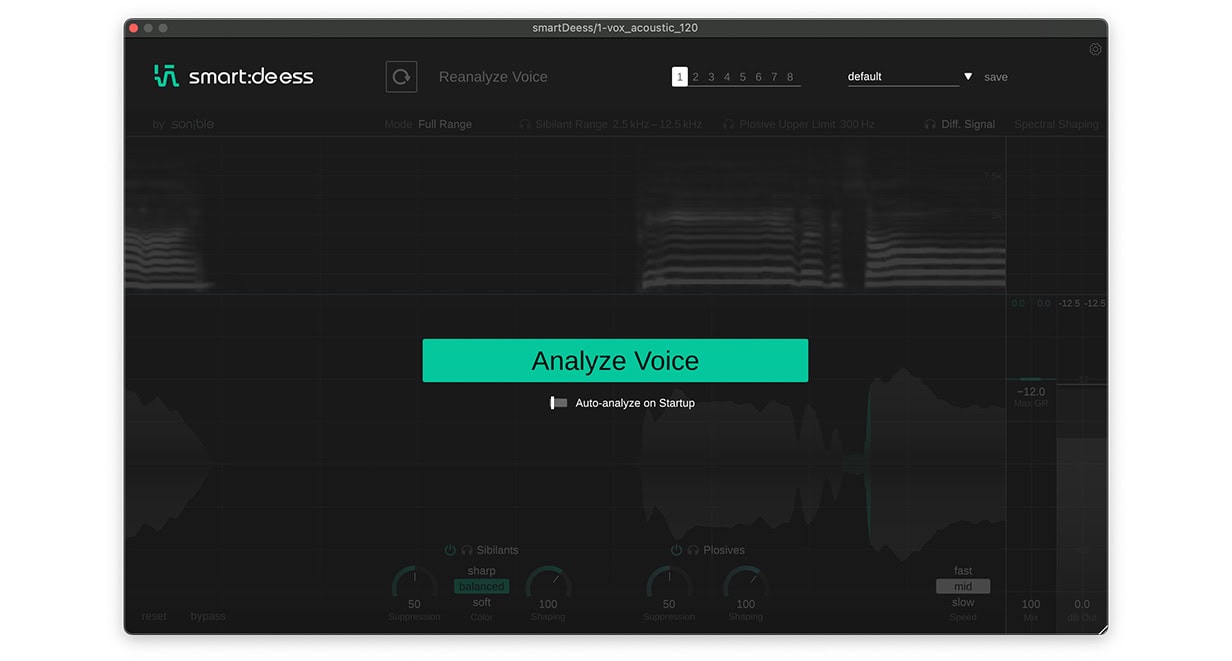
We’ve looped the problem area of the vocal and then clicked ‘Analyze Voice’. smart:deess will then listen to the audio, analyzing it to identify any plosives or sibilance in the vocal.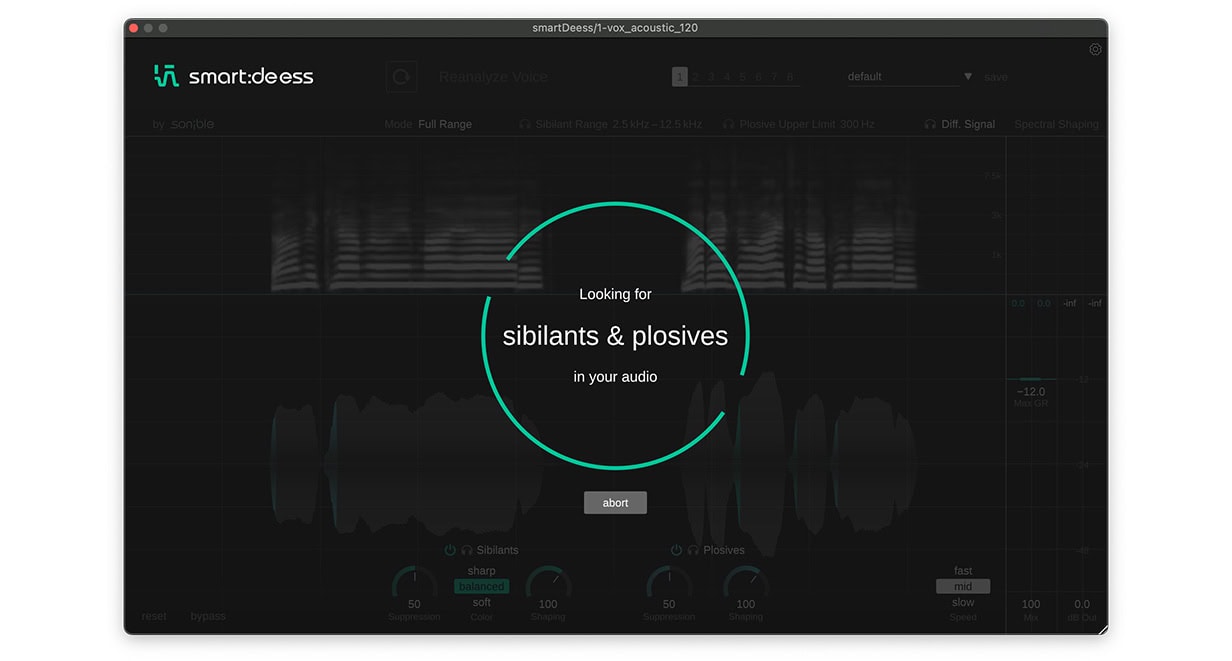
When smart:deess has finished analyzing the vocal, it the Spectogram in the top half of the interface will show sibilance in green, and plosives in blue. In the bottom half of the interface, the Waveform display will show the gain reduction being applied by the plugin.
Most of the default settings give a subtle de-essing effect, while retaining most of the character and tone of the dry vocal. However, because the vocals are relatively smooth to begin with, we can select the ‘sharp’ Color mode, as this gives us more precise de-essing that preserves more of the sparkle in the vocals.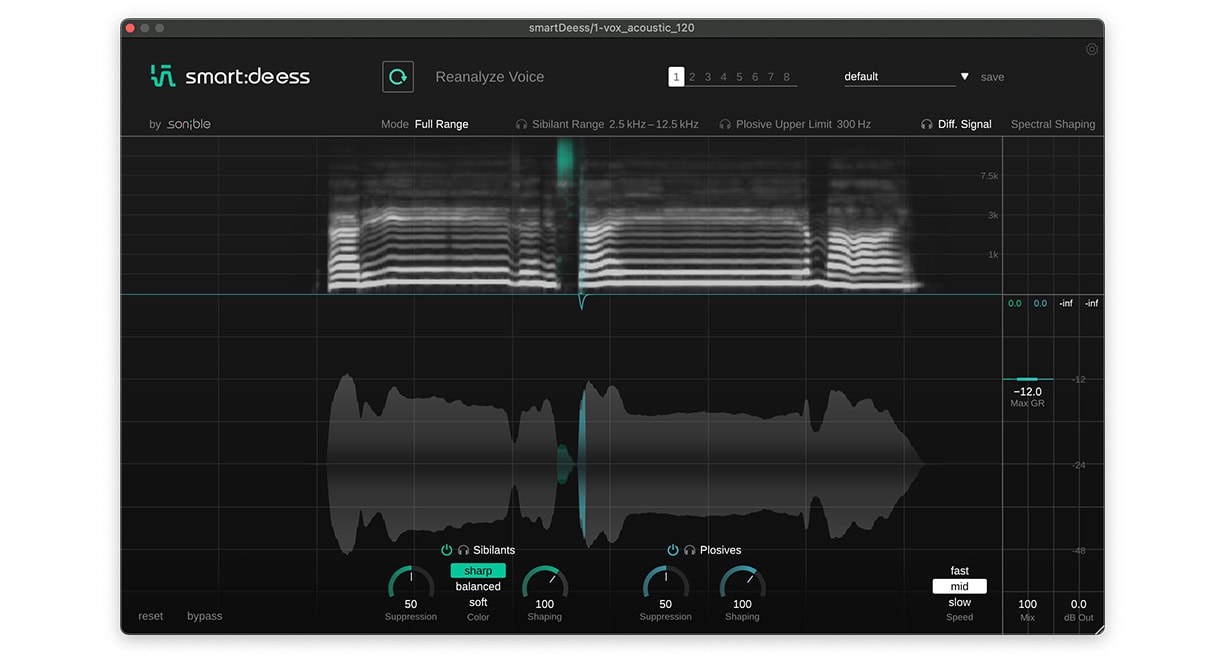
To hear the effect smart:deess is having on your audio, you can engage Diff. Signal mode. This allows you to hear the difference between the input and output, also known as the delta signal. While this is helpful for refining the processing being applied, it’s always best to use your ears and listen to the audio within the context of the full mix.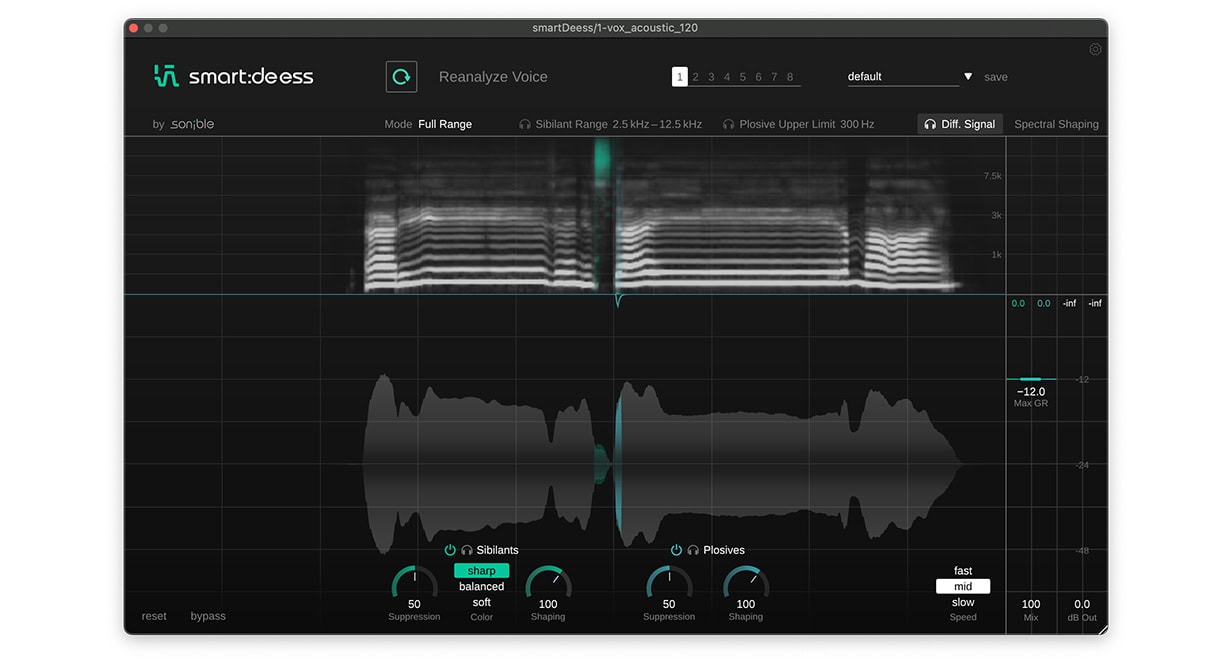
This vocal doesn’t have a massive issue with plosives and sibilance, but the processing we’re going to apply next may exacerbate these minor issues. With that in mind, it’s best to tackle the issues early on so that we can go into the mixing process with as clean of an audio signal as possible.

Next up, we’re going to tackle the vocal’s dynamics in a natural and musical way, while adding some body to the audio. As with many vocal performances, some lines, words and syllables are much louder than others, causing them to poke out of the mix. This can be seen in the waveform below.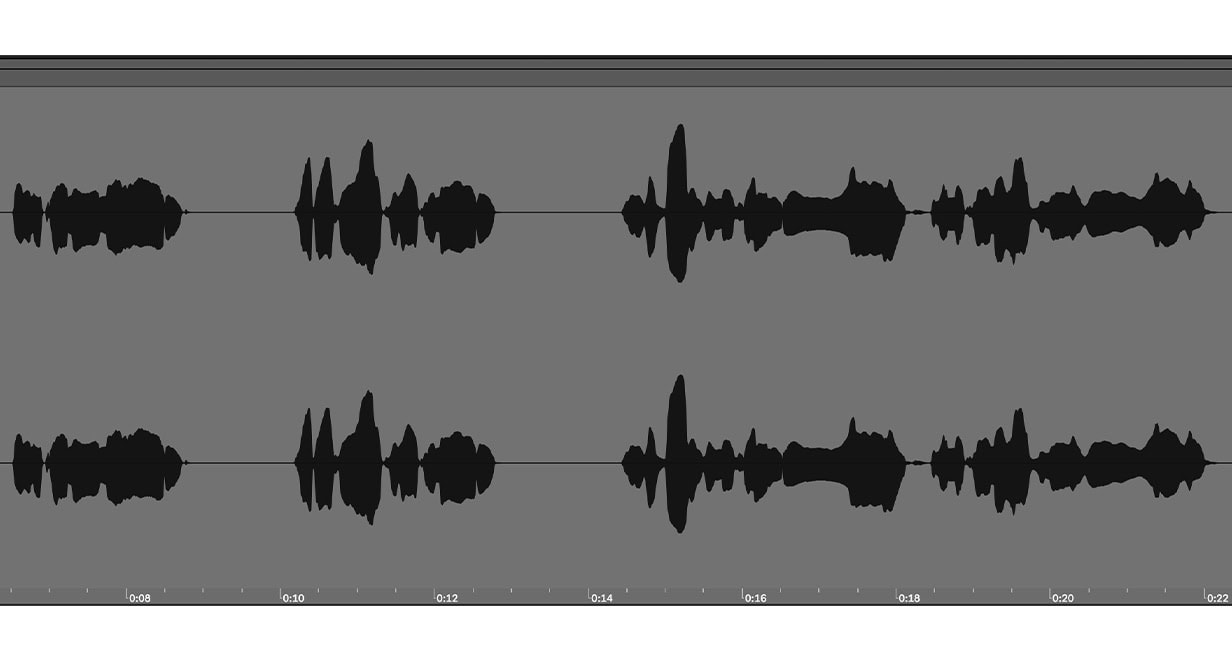 To control those extraneous peaks, we’ll be using two instances of smart:comp 2 to carry out serial compression. Place the first instance of smart:comp 2 on your vocal channel and loop the section of the vocal with the biggest peaks. You can then reduce the Ratio to between 4:1 and 5:1, and Threshold until your compressor begins to reduce the gain of the loudest parts of the signal.
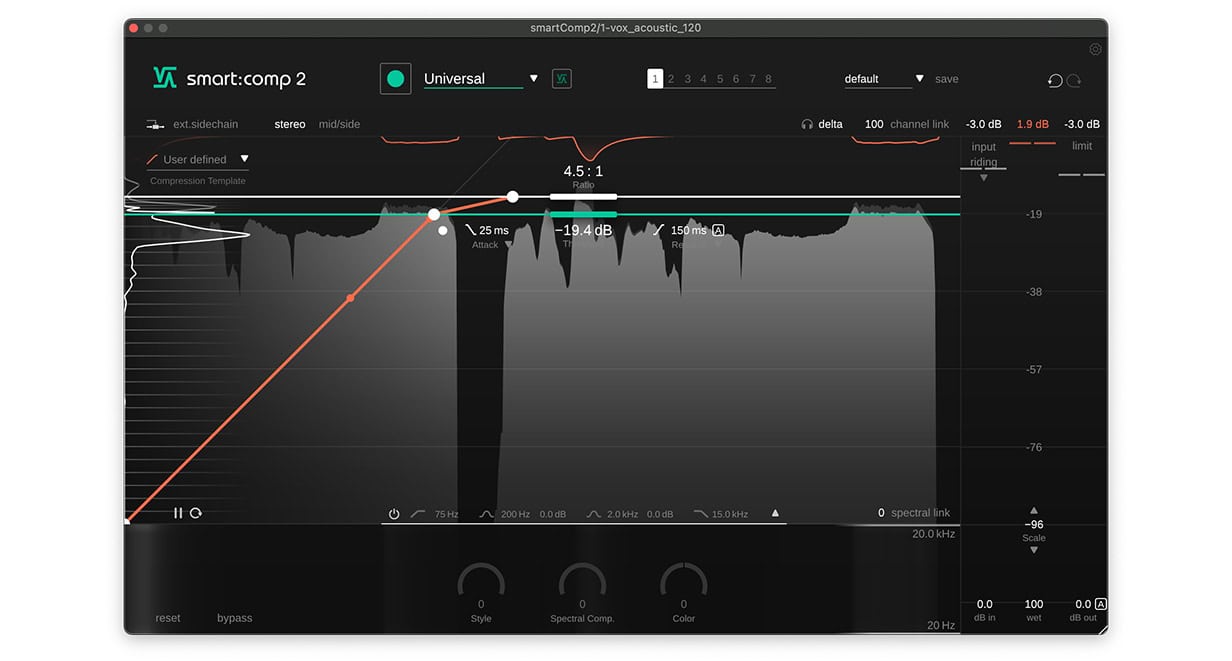
The task of the first compressor is to catch the dynamic peaks, so we want to apply compression with a fast Attack and Release time. We’ve applied 5ms of Attack and 40ms of Release, but you’ll need to tweak these values according to your audio.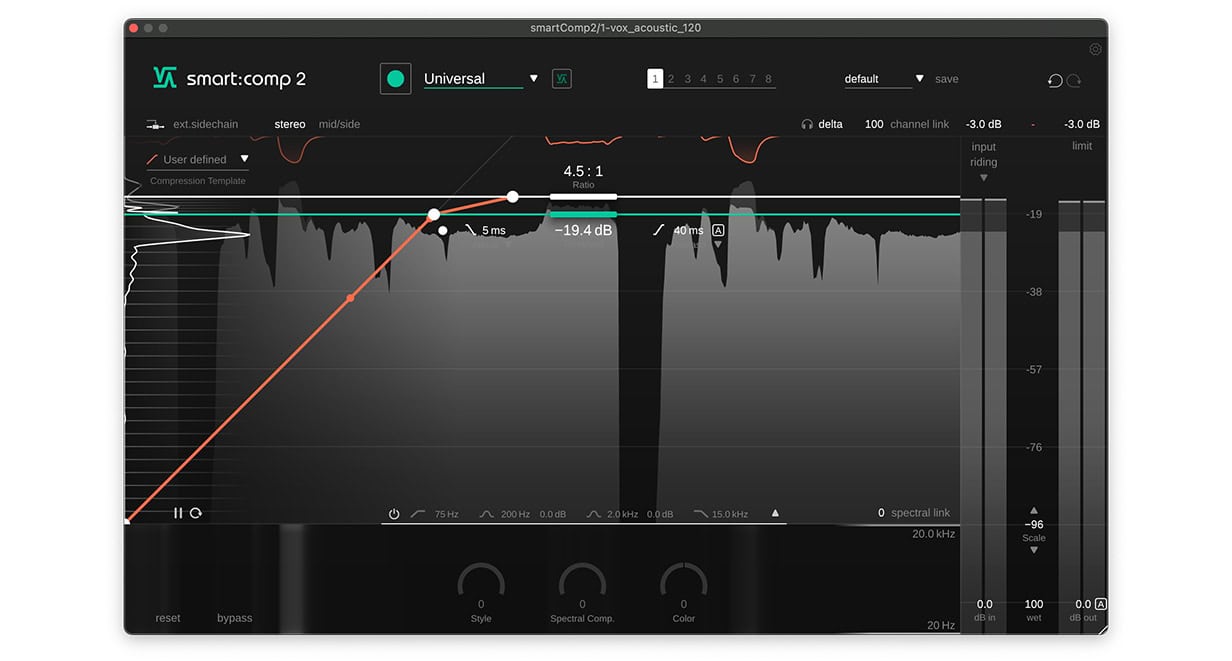
The second compressor’s task is to apply more general gain reduction across the entire vocal. This helps to give the vocal more body and cohesion. Once again, we’re going to use smart:comp 2. This time, we’re going to use the plugin’s smart functionality to achieve precise and balanced vocal dynamics. After loading the second instance of smart:comp 2 onto your vocal channel, select the appropriate Profile from the drop down menu, then click the ‘Learn’ button.
After smart:comp 2 has analyzed the signal, it will automatically set the recommended Ratio, Threshold and Attack and Release settings for your vocal. You can fine tune these parameters to taste if necessary. You can also use the other parameters to refine the tone and character of the compression being applied. For example, we can increase the Style value to give the vocal a warmer, tighter character.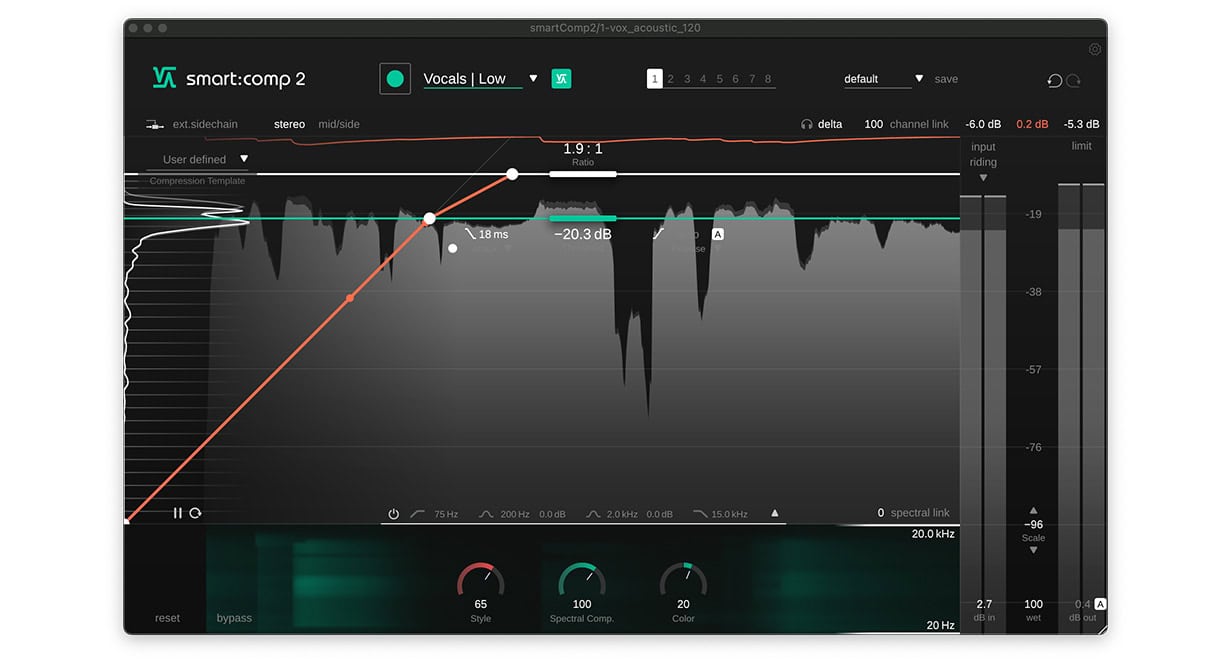
The tone of the original vocal leaves a lot to be desired. It sounds slightly muffled, which makes it difficult to understand the lyrics. The vocal is also honky, or boxy, which makes it unpleasant to listen to. We’re going to use smart:EQ 4 to take control of the tone of our vocal.
After loading smart:EQ 4 on your vocal channel, we need to select the appropriate Profile as we did with our second compressor. Once again, the plugin will analyze the signal and apply some recommended processing. Straight away, you can hear how much the vocal opens up with the EQ applied.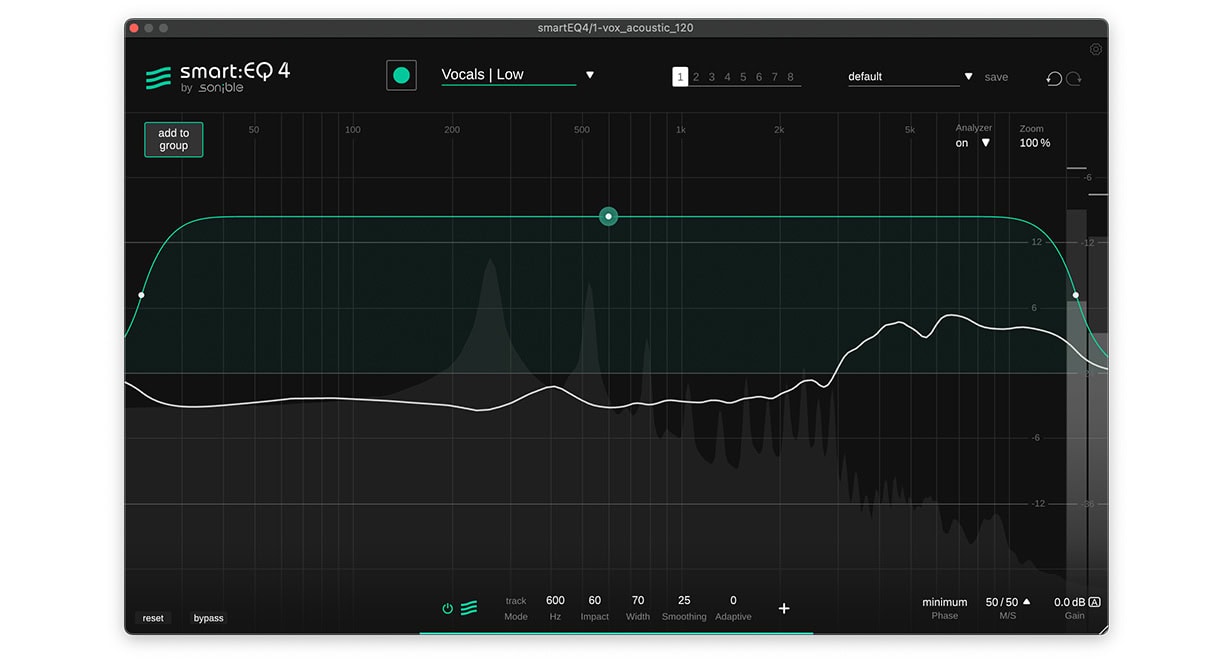
There is a slight buzziness or raspiness in the top end of the vocal, at around 8kHz to 9kHz. This frequency range has been accentuated by smart:EQ 4, but we can tackle this manually by double clicking on the Smart Filter in the Main Display. This will create a new EQ band that operates the same way as a traditional EQ.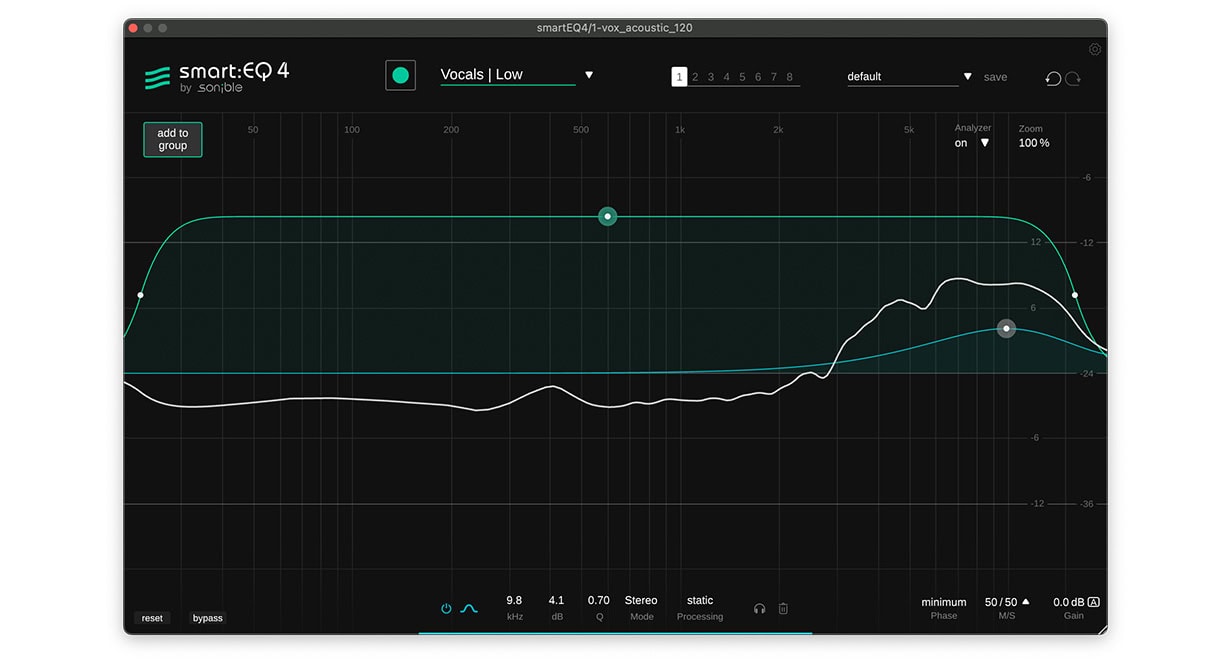
Using a bell filter and a low-to-medium Q value of around six, we’ve attenuated some of those unwanted frequencies. This helps the vocal to sound more balanced and less fuzzy. We’ve also removed the information below 150Hz, as it’s relatively unnecessary in the vocal and creates more room for other low frequency elements including the kick and bass.
While the vocal is now sounding more polished when isolated, it’s still not sitting with the rest of the mix very well. One of the reasons for this is that it is clashing with other melodic elements of the track, such the synth pad. We can use smart:EQ 4’s Group functionality to remedy the frequency masking occurring between the two elements.
First, place an instance of smart:EQ 4 on the channel that is clashing with your vocal, select the appropriate Profile and then click ‘Learn’. Once the plugin has analyzed the signal, click ‘add to group’. You will then be prompted to name the group.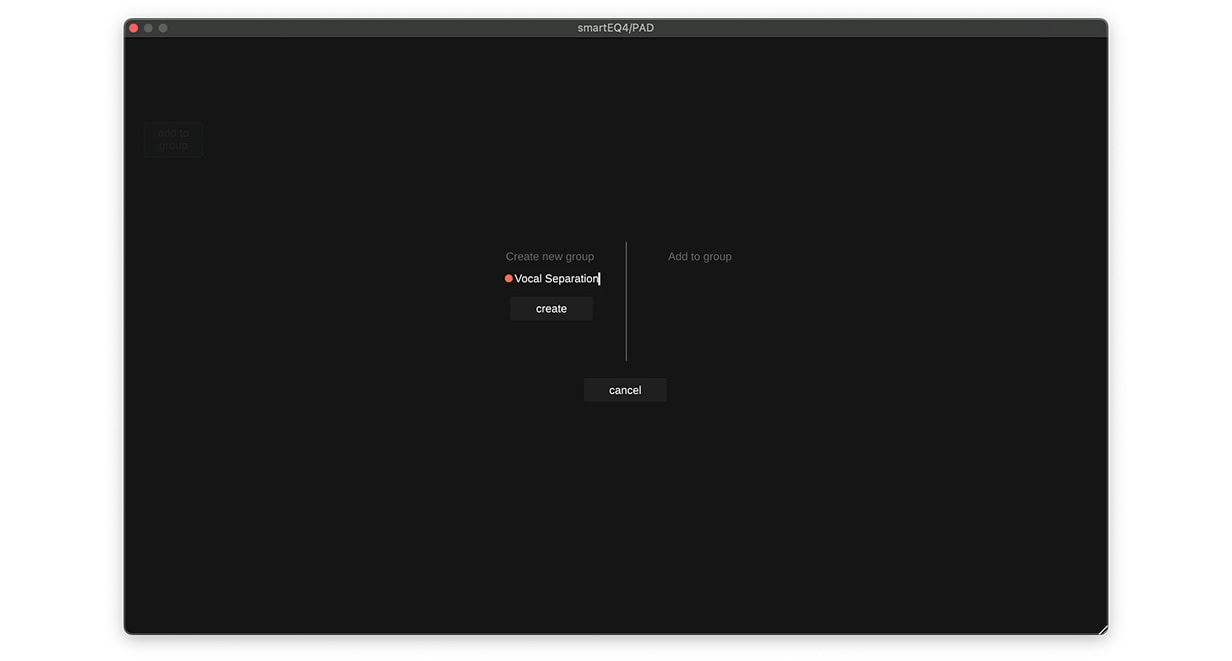
Now open the vocal’s instance of smart:EQ 4, click ‘add to group’ then add it to the Vocal Separation group. From the group view, you can see that both the vocal and synth pad contain lots of frequency information between 200Hz and 500Hz, which is causing the two elements to clash. By placing the vocal at the front of the mix and the pad at the back, each instance of smart:EQ 4 adapts the equalization being applied in order to give the vocal precedence over the synth.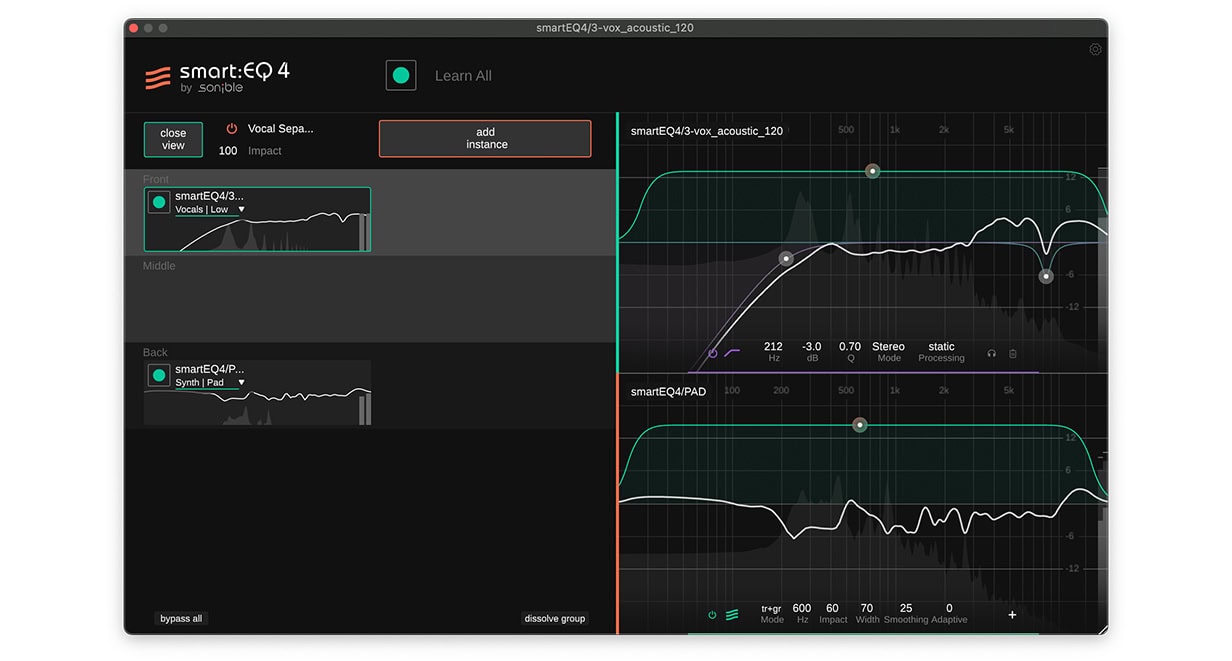
The vocal and pad are no longer fighting for space in the lower-mid frequency range, and the vocal is allowed to shine through the mix.
The equalization we applied in the last step helped to fit the vocal into the mix more cohesively, but we can take this further and add some space to the vocal by applying some reverb. We’re going to apply reverb on a return channel, as this leaves the dry vocal signal intact, and allows us to send other elements to the reverb too. This helps to give the impression that the entire mix belongs in a particular space, and helps to gel it all together.
Start by placing a reverb on a return channel. In this case, we’re using smart:reverb (Note: In this case we’re using the first version of smart:reverb. We replaced it for smart:reverb 2). Because we’re using the reverb as a return channel, we can turn the Dry level down to 0, and the Wet level up to 100. The track is of a medium tempo with a half time drum pattern, so we can use a medium to long Reverb Time of around two seconds. We’ve also added some Pre-Delay to separate the reverb from the dry signal slightly.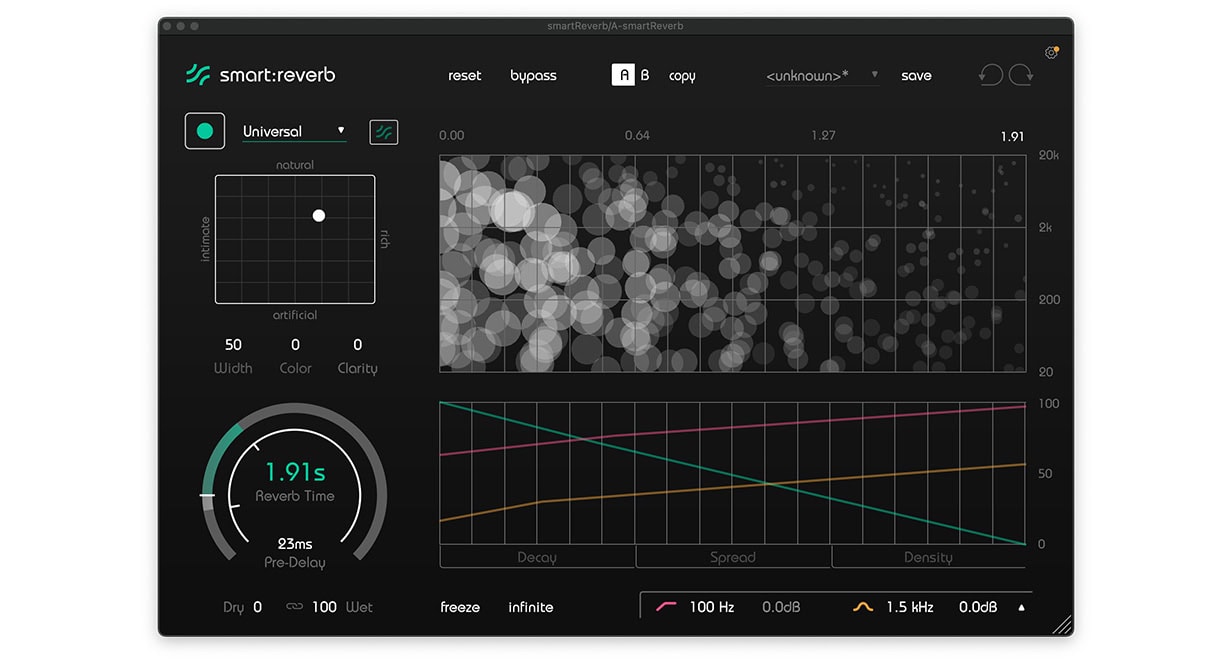
We’re then going to send the vocal and some of the melodic elements to the return channel. There is no right send amount for each element, so it’s best to use your ears as you solo the return channel until you feel you have a suitable balance. You can now tweak the reverb level, Reverb Time, Pre-Delay and other parameters until you’re happy with the overall reverb mix.
Within the context of the whole track, you can hear the impact these vocal mixing techniques have had on not only the vocal itself, but the overall mix.