Originally, the Mid/Side miking technique was used in specific situations. In recent years, the audio engineering community has rediscovered M/S and it’s now a part of the standard repertoire of mixing and mastering techniques in the digital domain. Rightly so! M/S processing adds new creative possibilities in terms of controlling the stereo image.
Handling the stereo image ranks among the most important aspects in every audio production. The stereo image defines the position of individual instruments and helps to create a full and wide mix. In addition to classical stereo processing, the Mid/Side or M/S technique is an effective method for shaping the stereo image right down to its smallest detail. You receive the Mid/Side signal either through a respective recording technique or through an M/S matrix within a plug-in, a mixer or a DAW.
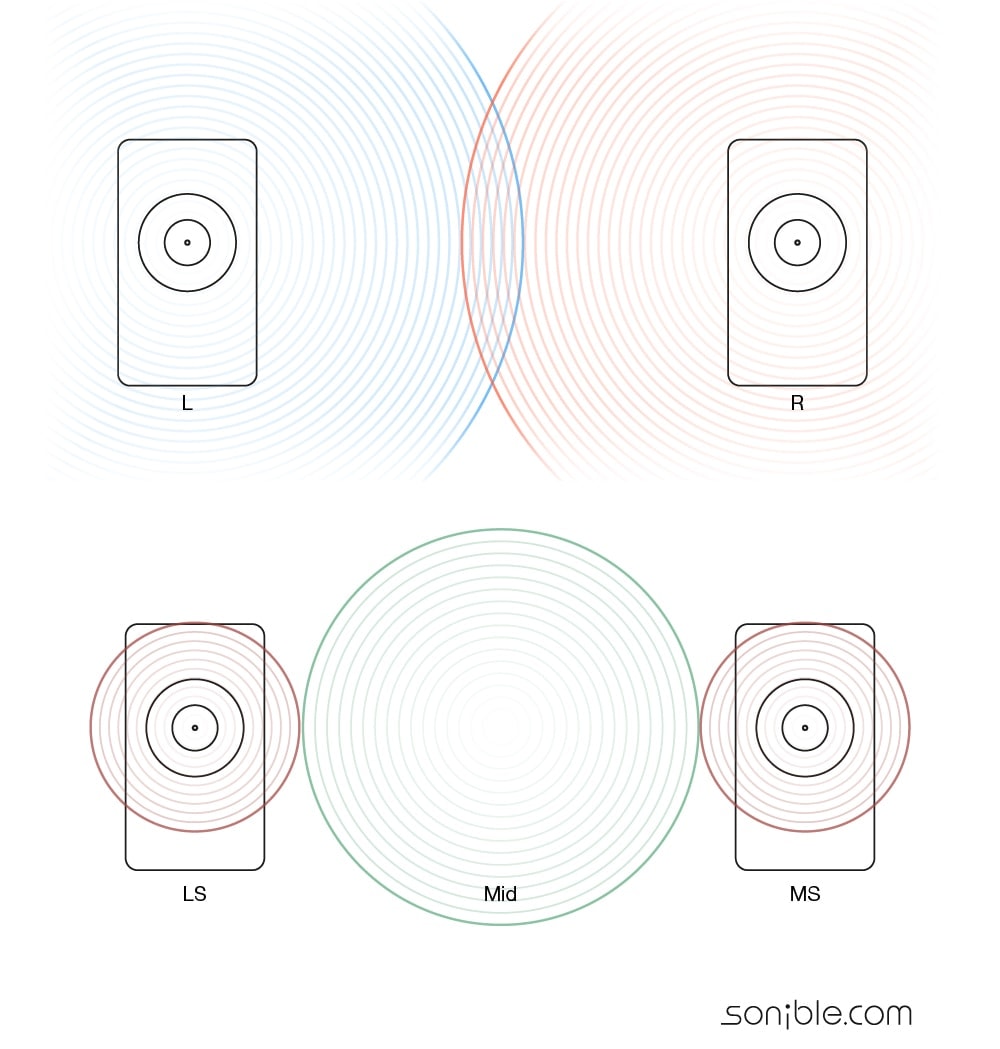
We will go into details later, but first a brief explanation of what Mid/Side actually means. The mid signal contains all the signal components that are distributed equally left and right (sum). These create a mono signal. Conversely, the side signal is composed of everything that differs between left and right (difference). Together the mid and the side signal combine to create to a complete stereo signal.
Before we get into a hands-on of its technical details, a little history of M/S first. Because what’s being widely applauded within the studios these days is almost ninety years old.
Originally, to receive a mid and a side signal, you needed to use the respective recording technique. Mid/Side Recording evolved because it guaranteed that stereo recordings were also compatible with Mono-Players. EMI engineer Alan Dower Blumlein – the “father of stereophony” – established the theoretical foundation for Mid/Side recordings already in the 1930s.
In the 1950s the Danish audio engineer Holger Lauridsen invented the Mid/Side Miking Technique to create mono-compatible stereo recordings for radio transmission – still a technique in common use today. The compatibility with mono mattered also in the production of records. This is because, in the 1950s and 60s, stereo recordings had not yet entirely replaced mono recordings on vinyl.
Today, all professional audio productions are – again – mono-compatible. Laptops, tablets, smartphones, audio systems within stores and even clubs typically playback mono signals. But M/S has more to offer than a simple technical benefit – it gives a range of creative and artistic possibilities. With it, you have better control over the stereo width and the space of a recording; a very convenient side effect.
Mid/Side is also known as “sum” and “difference” – which already alludes to its technical explanation. The “sum” describes all the signal components that are equal between the left and right channel and sum up into the Mid Signal (= Mono). The “difference” between the left and right channel yields the Side signal. Simple though the math may be, it has extensive consequences.
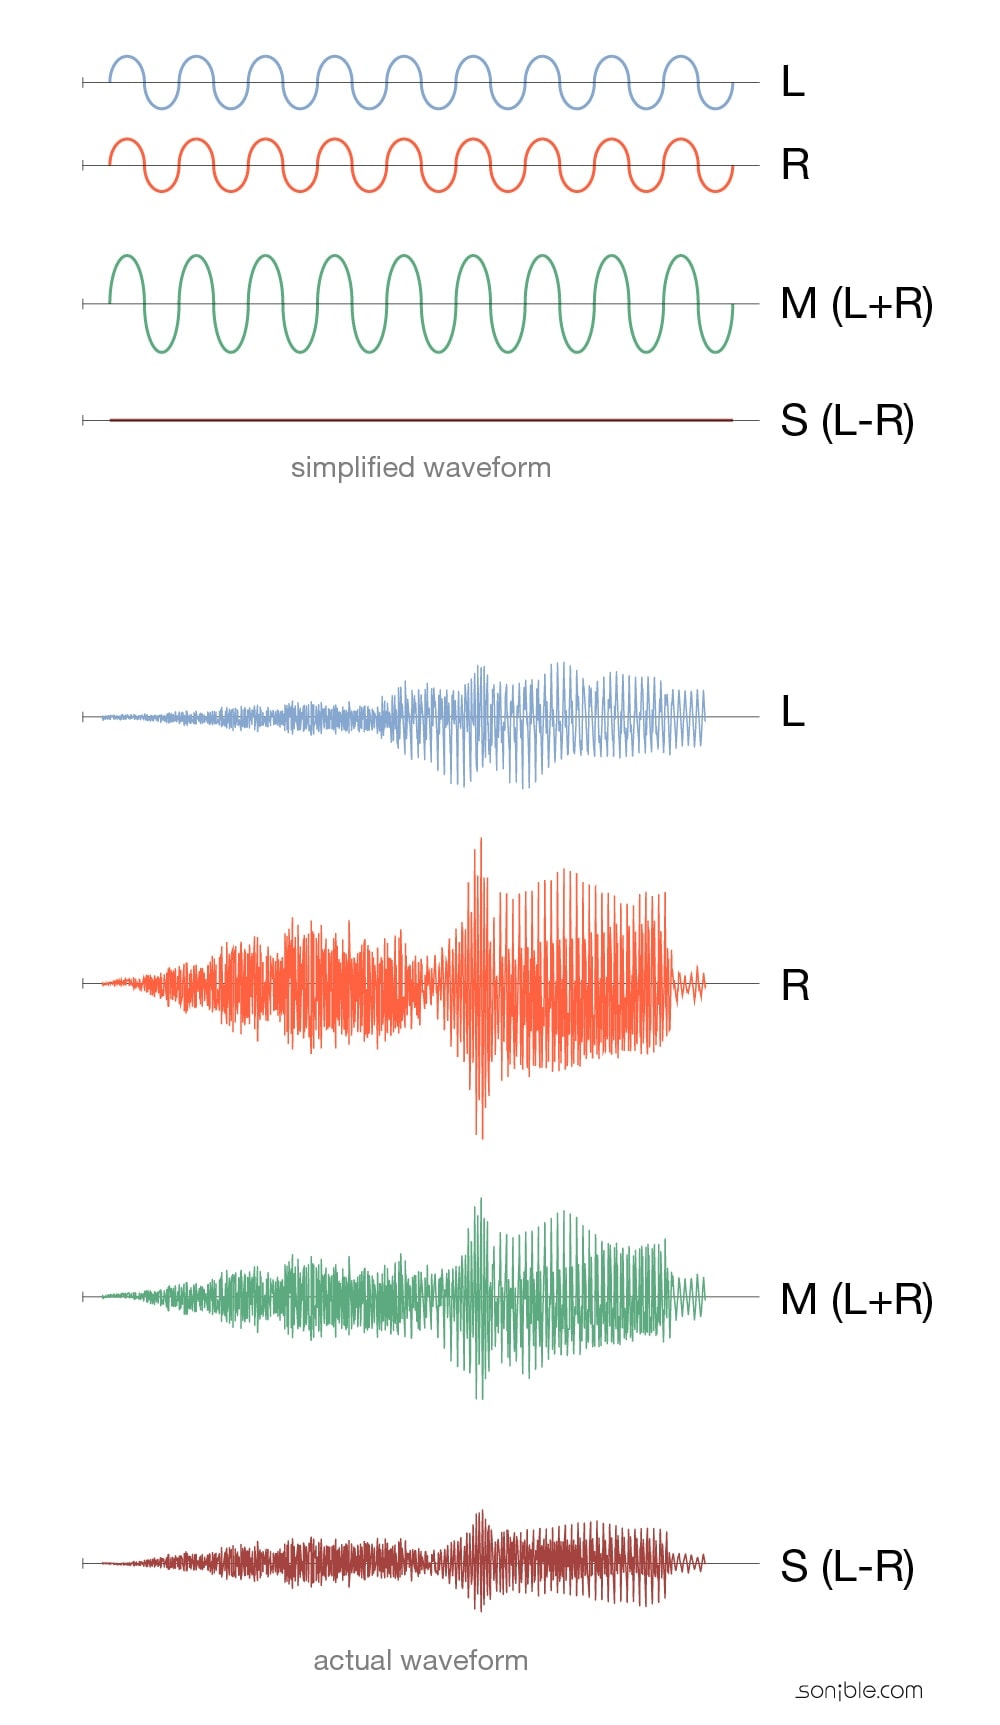
The left channel is composed by summing the mid and the side signal while the right channel results from subtracting the side from the mid signal.

And therefore:

The square root leaves the sum level steady which matches a lowering of 3dB. (read more about the basics here)
In case you don’t care about the math, listen to these examples. You will get the point!
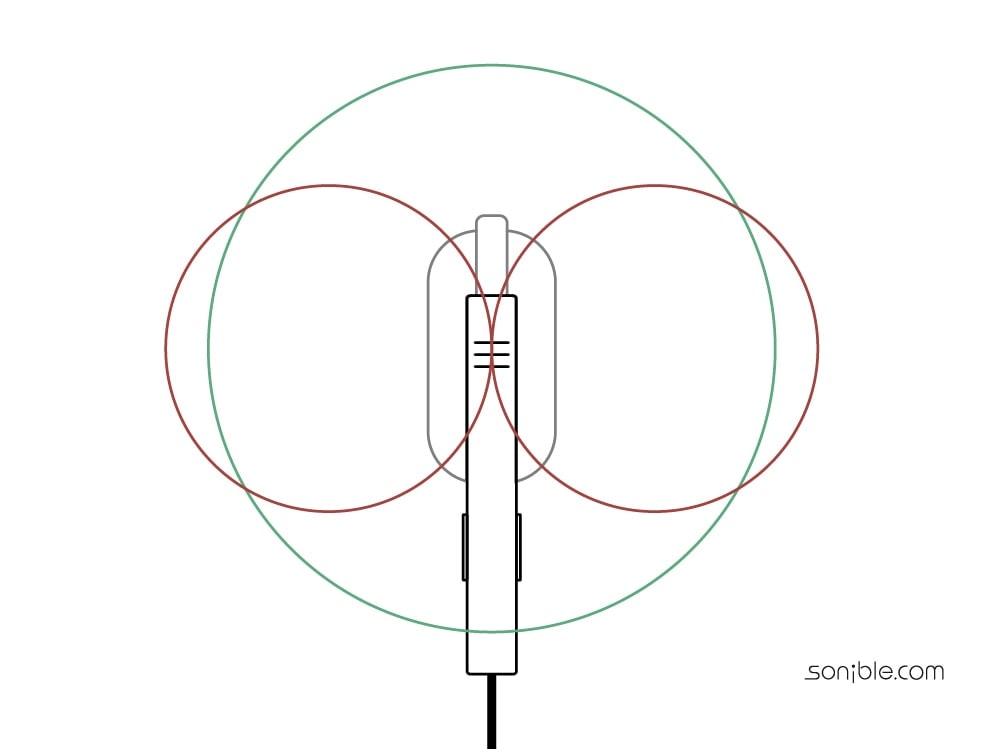
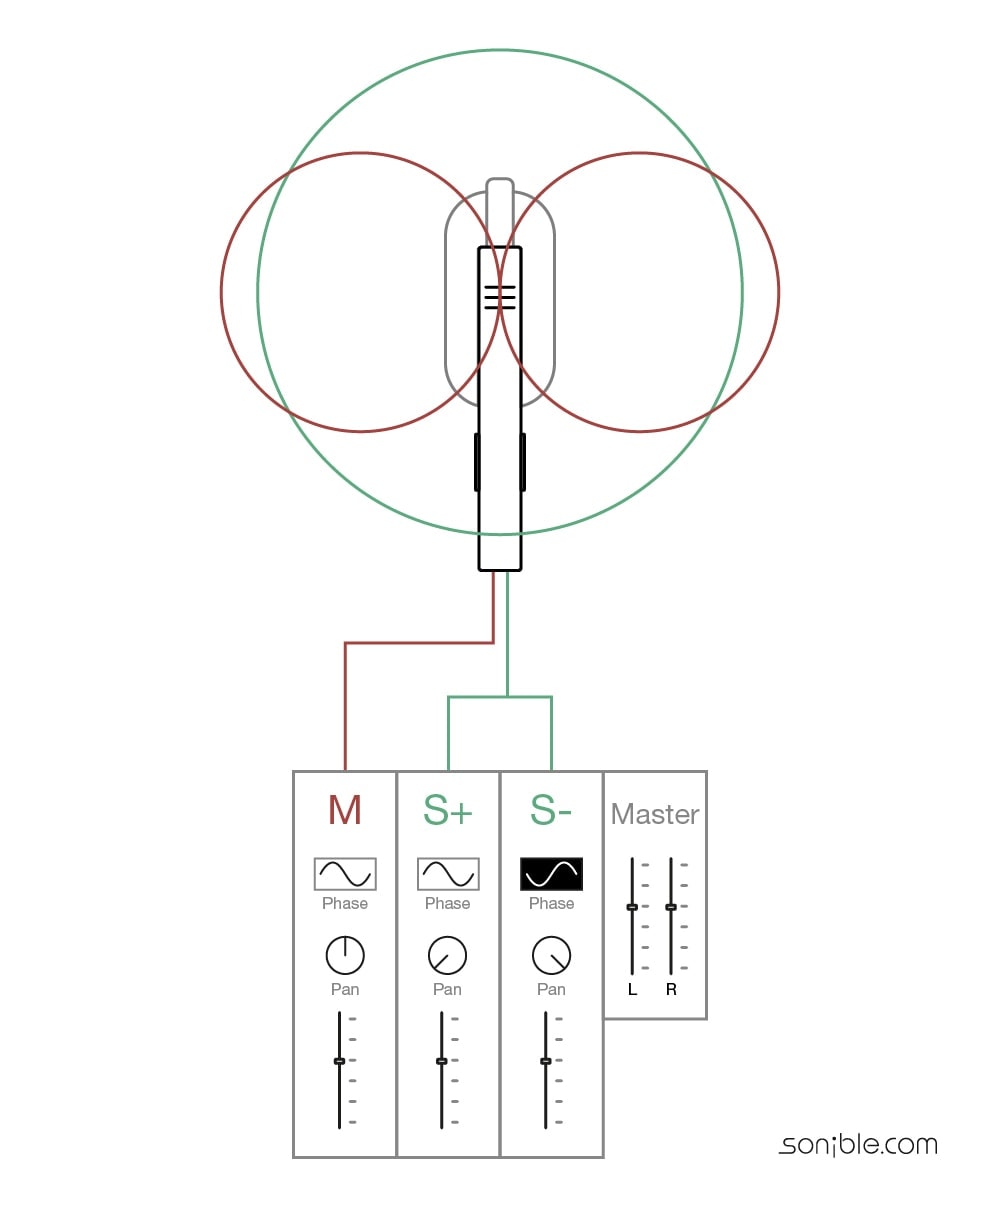
For M/S recording you need two microphones. One is located in the middle and is directed towards the acoustic source. This mic records the mono signal. In general, a microphone with omnidirectional or cardioid characteristics is used here. To record the side signal, a microphone with a bidirectional pattern (figure-eight) must be used. The latter is placed right above the mid mike without touching it and rotated 90° – therefore the mid is recording all direct sound components, while the side mike captures the ambient sound. The whole arrangement is called a coincident or X-Y setup.
Contrary to established opinions, M/S miking doesn’t create a greater stereo width than other techniques. Rather, with M/S recording the focus lies in the direct sound components (= Mono). The side mike enhances additional possibilities in terms of controlling the stereo image because it records the indirect sound components.
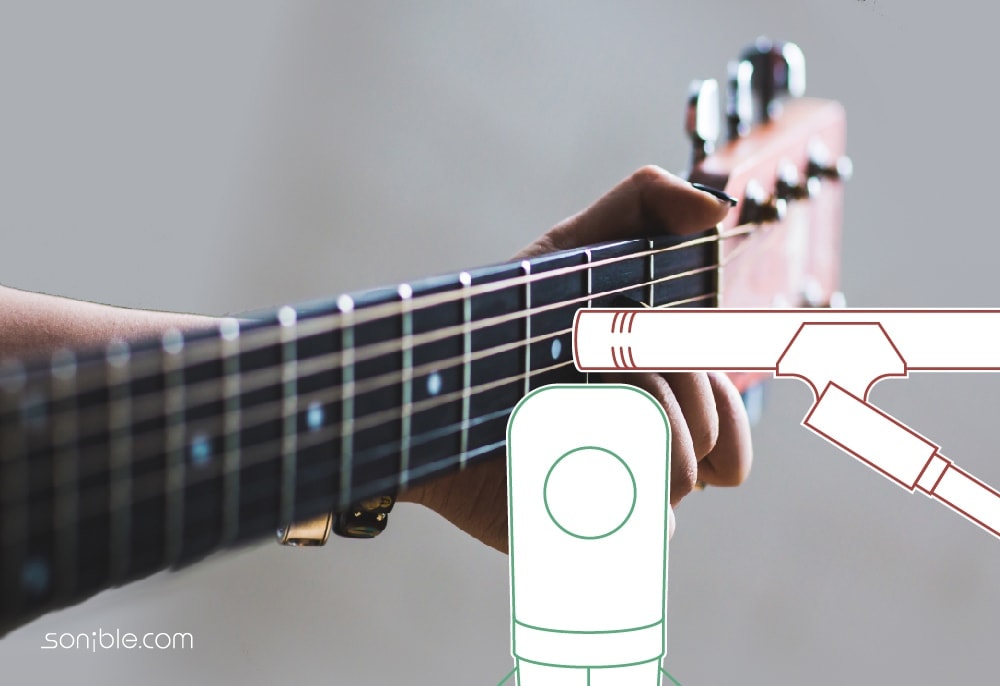
Mid/Side is especially suitable when making a close sounding recording. It is used with drum overheads, pianos, acoustic guitars, small vocal groups, and strings. In the end, using M/S is an aesthetic decision by the audio engineer or producer. Generally speaking, if you want to create a focused sound on the one hand with spaciousness and width on the other, M/S might suit your needs. The listener can clearly locate the direction of the sound source and in turn, the stereo width is limited.
Mid/Side recording is often used for acoustic solo guitars. Its focus of attention, together with the side signal, give a realistic, multi-faceted and yet wide and open sound image. The same applies to piano recordings.
Besides the AB arrangement, the M/S arrangement is also common for drum overheads. With M/S recording, the snare and kick drum can be lowered in the mid signal when additional spot microphones (close-miking) are used. The spot microphones guarantee a very clear and direct sound while the side signal captures the spatial impression. This way the drum kit sounds clear and spaciousness.
PROTIP An aesthetic decision: Use M/S miking when the direct signal in the center is also in the center of attention. Greater width can be created with Stereo A/B or ORTF arrangements.
M/S recordings allow a unique possibility in mixing. With an M/S matrix in the mixer, DAW or a plug-in, you can create three signals from the two (M and S) coming from the two microphones: one for the center, one for the left and one for the right side. The side signal is routed into the mixer (or DAW) twice, one with a hard left and the other a hard right panning. On one side the phase is inverted to make sure that the two sides do not cancel out each other.
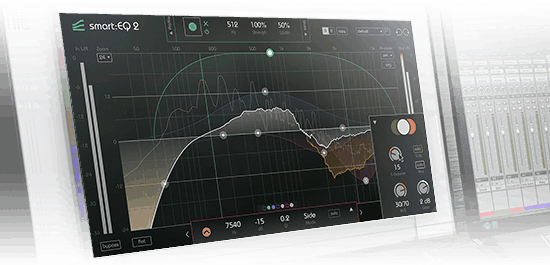
With Mid/Side processing in the digital domain, every stereo signal can be turned into an M/S signal. The conversion from left and right to mid and side is often done via a plug-in. For example: With smart:EQ 3, M/S can be easily integrated into every EQ Workflow. This is how the benefits of M/S processing can be used without having an actual M/S recording.
The different processing of the mid and side signals opens up great possibilities. With Mid/Side you create spaciousness within the mix without touching the spectral. Are two sounds getting in each other’s way? Use Mid/Side EQing and set one closer to the middle and the other more off to one side. Both instruments will remain perceptible with their characteristics untouched.
The perceived width of a recording can also be shaped with targeted M/S EQing. Reverberation and ambient sound hit the mike for the most part unevenly (“decorrelated”), and everything that is not equal is summed in the side signals. This is why the ambient sound and stereo width can be adjusted on M/S recordings through M/S EQing.
If you increase the difference between mid and side components by EQing, the difference increases and the stereo image becomes wider. But be careful, this method has its limits. Too much difference leads to a “phasy” sound, with the presence in the middle missing and mono compatibility is no longer possible.
If you attenuate the side parts (or increase the mid parts) the sound becomes more direct and the character changes minimally. With this interaction between mid and side, the depth of a mix can also be cleverly influenced in certain situations.
Mid/Side also reveals new possibilities in mastering. In the low end especially, the difference between left and right is reduced to a minimum. A low cut on the side signals keeps the bass nicely focused in the middle as the auditory perception of direction and location in the room decreases with lower frequencies. Too much side signal not only blurs the bass but also must be reduced sometimes for vinyl mastering, as too many low side signals can throw the needle out of the record groove.
On the other side of the spectrum, the targeted lifting of the side parts gives the entire mix some air and width without making it too sharp. The removal of resonances in the mid and side signal allows further “surgical” intervention possibilities in the last steps of production. In some cases, even vocals or drums (mid) that are too loud can be better fitted-in without destroying the character of the whole track.
PROTIP Mid/Side is a very advanced technique. First, the mono-mix should be mastered. Second, place the instruments with a “classic” panning to create depth and width. The Mid/Side is then the icing on the cake.
Happy Mixing & Music Making!